Generating a Fake Database with Python

As someone who is frequently building data engineering projects, I find myself spending a good deal of time sifting through public api’s, searching for the “right” kind of data that will fit my needs.
I may need updated time-series data to build something using an orchestrator such as Airflow. I may look for less structured and highly unpredictable data because I want to work with a document database. In any case, finding useful data is difficult, and in this article, I aim to show how we can use a few exciting libraries to …
- Design a quick data model that will be used to organize our generated data.
- Create our schema using Postgres and SQL Alchemy.
- Generate data with Faker.
The Data Model
⚠️ Database design and modeling are very complex and interesting topics, and it deserves its own article. With that being said, our design will be very minimal and amateur but will suffice for our objective.
Let’s think ahead for a sec and determine what we require from the generated database …
- Multiple tables.
- Relationships between those tables.
- At least one numeric attribute.
- Diversity of data types.
The easiest way of coming up with such a model is to think of an e-commerce-like business event, translate that event into a table, and begin the process of normalizing that table. An example of such an event might go as follows …
“A single product is sold to a customer, in one of many stores, on some date.”
We will start by constructing a table with all the attributes we can consider associated with this transaction.

Breaking this table up is easy if we adopt the idea that each table should only be about one “thing.” Technically speaking, any partially dependent columns on the primary key should be moved to another table.
The first step is creating a primary key on the table to identify each transaction uniquely. Next, we identify and group columns that represent something more than a transaction. For example, cust_first_name, cust_last_name, email, cust_address, and dob all relate to a specific customer and need to be added to a customers table. A primary key should be created on every table that is generated. Finally, we establish a relationship between the transactions and the newly created tables. This is done by adding all of the new primary key fields to the transactions table as foreign keys.

Perfect! we now have related tables containing various data types, which can be joined using their keys. Additionally, mathematical functions can be applied to the numeric price column in the products table. Mission accomplished 🚀 .
From Design to Code
It’s time to use our entity-relationship diagram to help build a Postgres database.
Postgres will live in a docker container for this project, so no need to worry about installing and configuring any tools on your machine (of course, you must have python and docker installed). Let’s start creating the tables using SQL alchemy and leave the Postgres setup for later.
SQL alchemy is not just an Object-Relational Mapper. We will not touch the ORM for this article and instead focus on SQL alchemy Core for creating the tables. Core is comprised of an engine and pool that will help us maintain our database connection in memory, a dialect to interpret commands to the database API (psycopg in our case), an SQL expression language that allows us to write SQL statements using python expressions, and Data Definition Language tools that use python objects to represent tables, columns, and datatypes. If you want to dive deep into SQL alchemy, I highly recommend watching this video by Mike Bayer along with the official documentation.
We begin by creating our project folder.
$ mkdir generate-fake-dbdata
$ cd generate-fake-dbdata
Next is the requirements file needed to install the libraries necessary for this project.
$ touch requirements.txt# Requirements.txt
faker
psycopg2-binary
SQLAlchemy
Now let's create and activate a virtual environment, and install the libraries in our requirements.txt
$ python3 -m venv ./venv
$ source venv/bin/activate
(venv) $ pip install --upgrade pip
(venv) $ pip install -r requirements.txt
Great! We can now make a script to create our tables in a Postgres database (which we have not yet setup).
(venv) $ touch create_tables.pyLet’s import the required modules from SQL alchemy and set up the connection to Postgres,
# create_tables.py
from sqlalchemy import create_engine, MetaData, \
    Column, Integer, Numeric, String, Date, Table, ForeignKey
# Set up connection between sqlalchemy and postgres dbapi
engine = create_engine(
    "postgresql://postgres:postgres@localhost:5432/fakedata"
)# Create a metadata object
metadata = MetaData()
A few things to unpack here.
First, the connection string in our engine is of the form “dialect+driver://username:password@host:port/database”. The user name, password, and database do not yet exist. However, they will be later established when creating our docker-compose file.
The second interesting component of our script is the MetaData object. This is used to describe the structure of the database in terms of data structures in Python. In our case, we will be using the MetaData object to create a schema (DDL) in Postgres.
We can now finish the rest of the script by using the Table object to create the customers, products, stores, and transactions table.
# create_tables.py...DDL for customers, products, stores, and transactions
customers_table = Table(
    "customers",
    metadata,
    Column("customer_id", Integer, primary_key=True),
    Column("first_name", String(35), nullable=False),
    Column("last_name", String(35), nullable=False),
    Column("email", String(35), nullable=False),
    Column("address", String(135), nullable=False),
    Column("dob", Date, nullable=False)
)products_table = Table(
    "products",
    metadata,
    Column("product_id", Integer, primary_key=True),
    Column("name", String(35), nullable=False),
    Column("price", Numeric(10,2), nullable=False),
)stores_table = Table(
    "stores",
    metadata,
    Column("store_id", Integer, primary_key=True),
    Column("address", String(135), nullable=True)
)transactions_table = Table(
    "transactions",
    metadata,
    Column("transactions_id", Integer, primary_key=True),
    Column("transaction_date", Date, nullable=False),
    Column("customer_id", ForeignKey("customers.customer_id"),
        nullable=False),
    Column("product_id", ForeignKey("products.product_id"),
        nullable=False),
    Column("store_id", ForeignKey("stores.store_id"),
        nullable=False)
)# Start transaction to commit DDL to postgres database
with engine.begin() as conn:
    metadata.create_all(conn)    # Log the tables as they are created
    for table in metadata.tables.keys():
        print(f"{table} successfully created")
This is what the project structure should look like so far,
generate-fake-dbdata
|--- create_tables.py
|--- requirements.txt
|--- venv/
Postgres Setup
Before running the create_tables.py script, we need to create the database. docker-compose makes this process super simple.
# In Project root
(venv) $ touch docker-compose.yaml
The user name, password, and database are created by passing environment variables to the image.
# docker-compose.yaml
version: '3.8'services:
  postgres:
    restart: always
    image: postgres:9.6
    environment:
      - POSTGRES_USER=postgres
      - POSTGRES_PASSWORD=postgres
      - POSTGRES_DB=fakedata
      - POSTGRES_PORT=5432
    ports:
      - '5432:5432'
    volumes:
      - ./db:/var/lib/postgresql/data
And that's it!
The volumes configuration will allow us to persist data in a db/ folder within our project directory. You will see this directory created once we run docker-compose.
# In project root
(venv) $ docker-compose up -d
We should verify that our container is up and running before moving further.

👏 Excellent 👏
Go ahead and copy the CONTAINER ID displayed in your terminal, as we will need it later.
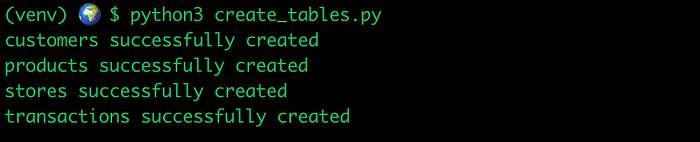
We can finally execute the create_tables.py script. The output will show the tables that were successfully created.
Let’s inspect our Postgres database to make sure everything looks good.
(venv) $ docker exec -it <CONTAINER ID> /bin/bashThis command will open a terminal inside the container. We can navigate Postgres in the terminal by using psql.
root@<CONTAINER ID>:/# psql -U postgres -d fakedataUse the \dt command to list the tables in the database.

Before moving to the final section of the project, let’s check in on our project structure to make sure we are all on the same page.
generate-fake-dbdata
|--- create_tables.py
|--- requirements.txt
|--- docker-compose.yaml
|--- db/
|--- venv/
Generating the Data
Faker is much more straight forward when compared to SQL alchemy. It is a simple yet useful library that generates fake data.
We will use the SQL expression layer of SQL alchemy to insert our fake values into the fakedata database. Setting up the connection consist of the same steps taken when creating the tables; however, instead of using the Metadata object to generate schema to a database, we will use it to generate from the existing schema in the fakedata database by using the reflect method.
Before creating our script, let’s think about how we want to use it. It is easy to write a script that writes a fixed number of records to all tables. However, we may want to add more flexibility, such as choosing the target table to update as well as the number of records for insertion. A simple plan to execute is passing the name of the table along with the number of records for insertion when executing the script.
For example,
(venv) $ python3 script.py <TABLE_NAME> number_of_recordsLet’s get to it!
# Project root
(venv) $ touch populate_tables.py
We make sure to import the necessary libraries and prepare the connection and metadata.
# populate_tables.py
from sqlalchemy import create_engine, Metadata, select
from faker import Faker
import sys
import random
import datetime# Set up connections between sqlalchemy and postgres dbapi
engine = create_engine(
    "postgresql://postgres:postgres@localhost:5432/fakedata"
)# Instantiate metadata class
metadata = MetaData()# Instantiate faker class
faker = Faker()# Reflect metadata/schema from existing postgres database
with engine.connect() as conn:
    metadata.reflect(conn)# create table objects
customers = metadata.tables.keys["customers"]
products = metadata.tables.keys["products"]
stores = metadata.tables.keys["stores"]
transactions = metadata.tables.keys["transactions"]
The other half of the script generates the data and executes the insertions. Let’s create a class to handle the command line arguments and make the appropriate choice of insertion based on those arguments.
# populate_tables.py...# list of fake products to insert into the products table
product_list = ["hat", "cap", "shirt", "sweater", "sweatshirt",
    "shorts", "jeans", "sneakers", "boots", "coat", "accessories"]class GenerateData:
    """
    generate a specific number of records to a target table in the
    postgres database.
    """

    def __init__(self):
        """
        define command line arguments.
        """
        self.table = sys.argv[1]
        self.num_records = int(sys.argv[2])    def create_data(self):
        """
        using the faker library, generate data and execute DML.
        """

        if self.table not in metadata.tables.keys():
            return print(f"{self.table} does not exist")

        if self.table == "customers":
            ...        if self.table == "products":
            ...        if self.table == "stores":
            ...        if self.table == "transactions":
            ...if __name__ == "__main__":
    generate_data = GenerateData()
    generate_data.create_data()
We will go over the code for each table one by one. First up is the customers table.
# populate_tables.py
# Customers ...

if self.table == "customers":
  with engine.begin() as conn:
    for _ in range(self.num_records):
      insert_stmt = customers.insert().values(
        first_name = faker.first_name(),
        last_name = faker.last_name(),
        email = faker.email(),
        address = faker.address(),
        dob = faker.date_of_birth(minimum_age=16, maximum_age=60)
      )
      conn.execute(insert_stmt)
The above code is pretty straightforward. We access the desired Faker methods for generating fake data and begin a transaction to insert that data into Postgres. We do not need to pass a value for the primary key since we defined that field to autoincrement with every new record. Also, we use a context manager to ensure our changes are committed, and any resources are closed after the transaction.
On to the products table…
# populate_tables.py
# products...if self.table == "products":
  with engine.begin() as conn:
    for _ in range(self.num_records):
      insert_stmt = products.insert().values(
        name = random.choice(product_list),
        price = faker.random_int(1, 100000) / 100.0
      )
      conn.execute(insert_stmt)
We defined a global list of fake products to randomly insert into our tables for the products table. Since there is a good chance that a given product will be randomly chosen multiple times for insertion, we will assume that the combination of the product_id and name constitutes a unique item. For example, (3, “sweater”) and (17, “sweater”) refers to two different types of sweaters (could be a different brand, size, etc.).
The logic for the stores table is similar…
# populates_tables.py
# stores...if self.table == "stores":
  with engine.begin() as conn:
    for _ in range(self.num_records):
      insert_stmt = stores.insert().values(
        address = faker.address()
      )
      conn.execute(insert_stmt)
We must be careful in how we insert randomly generated data into the transactions table. This is because of the constraints, specifically the foreign keys that relate transactions to the rest of the database tables. An issue would arise if we were to generate a transaction with a customer_id, product_id, or store_id that did not already exist in the customers table.
The best way of avoiding such an integrity issue is by querying the customers, products, and stores table, retrieving their primary id’s, and randomly selecting from those results. This ensures that every foreign key value inserted into the transactions table already exists in their primary tables.
# populates_tables.py
# transactions...if self.table == "transactions":
  with engine.begin() as conn:
    for _ in range(self.num_records):      date_obj = datetime.datetime.now()
                 - datetime.timdelta(days=random.randint(0,30))
      cust = conn.
             execute(select([customers.c.customer_id])).
             fetchall()
      prod = conn.
             execute(select([products.c.product_id])).
             fetchall()
      store = conn.
              execute(select([stores.c.store_id])).
              fetchall()

      insert_stmt = transactions.insert().values(
        transaction_date = date_obj.strftime("%Y/%m/%d")
        customer_id=random.choice(cust)[0],
        product_id=random.choice(prod)[0],
        store_id=random.choice(store)[0]
      )
      conn.execute(insert_stmt)
When querying the tables for their id’s using the fetchall() method, the result is returned as a list of tuples. This means that we have to retrieve the first element of the randomly chosen tuple even if we only asked for the id column.
We can now run the following commands to generate 100 records in the customers table, 50 records in the products table, 10 records in the stores table, and 200 records in the transactions table.
⚠️ Make sure that data has been generated for customers, stores, and products before generating data for the transactions table.
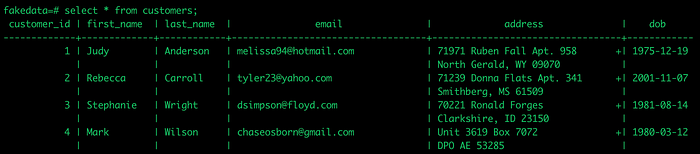
(venv) $ python3 populate_tables.py customers 100
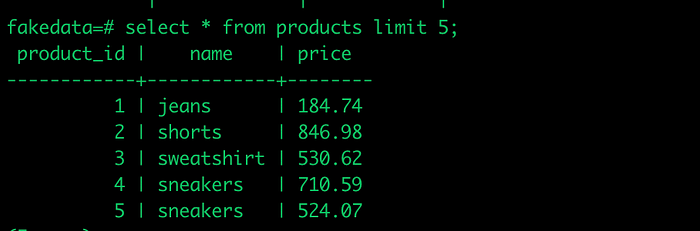
(venv) $ python3 populate_tables.py products 50
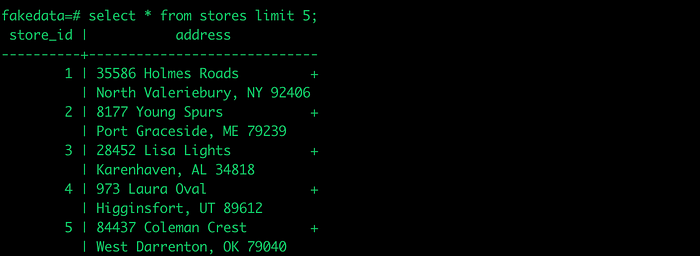
(venv) $ python3 populate_tables.py stores 10
(venv) $ python3 populate_tables.py transactions 200Let’s check Postgres for confirmation.

Our final project structure should look like the following…
generate-fake-dbdata
|--- create_tables.py
|--- populate_tables.py
|--- requirements.txt
|--- docker-compose.yaml
|--- db/
|--- venv/
Wrap up
We now have an easy way of generating data that fits our specific needs. It is no longer necessary to endlessly search for the “right” data to support our data-centric projects.
I hope this brings a lot of value to my readers. Please visit my Github to access the repository for this project.
Cheers!